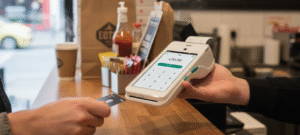
Dojo offers businesses a payment solution that processes transactions 58% faster than the market average, according to an independent study by Savanta (2023). When setting up a payment system for your business, speed and reliability are crucial factors that can significantly impact your daily operations and customer satisfaction.
Furthermore, the dojo card machine comes with several advantages that make it an attractive option for merchants. In fact, you’ll benefit from transaction fees as low as 1%, next-day payouts seven days a week, and extensive EPOS integration capabilities. Additionally, if you’re switching from another provider, Dojo can pay up to £3,000 of your exit fees from your previous contract. In this guide, we’ll walk you through the simple steps to set up your Dojo card machine and start accepting payments today.
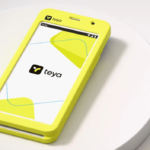
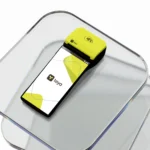
Unboxing and Preparing Your Dojo Card Machine
Getting started with your Dojo card machine begins with proper unboxing and setup. Once you’ve received your package, setting up the device properly ensures you’ll be ready to accept payments quickly and efficiently.
Check the box contents
Initially, you should unpack your Dojo Go package and verify all components are present. The box typically contains your Dojo card machine, a charging base, power adapter, and USB cable. Take a moment to inspect all items for any visible damage. Arrange everything on a clean, flat surface so you can easily access each component during setup.
Remove battery protection and insert battery
Next, you’ll need to prepare the battery for first use. To do this:
- Turn over the card machine and locate the battery compartment on the back
- Open the back cover carefully to access the battery
- Remove the battery from its slot
- Look for the protective sticker that prevents battery drain during shipping
- Peel off this battery protection sticker completely
- Reinsert the battery properly into its compartment
- Close the back cover, ensuring it clicks securely into place
This step is crucial as the machine won’t function properly if the battery protection remains in place. The protective sticker prevents battery drainage during shipping and storage, which is why it must be removed before first use.
Power on the device for the first time
After preparing the battery, it’s time to power up your Dojo card machine:
- Connect the USB cable to the power adapter provided in your package
- Plug the power adapter into a wall outlet
- Connect the other end of the USB cable to the charging base[62]
- Place the card machine onto the charging base
- Hold down the power button for 2-4 seconds until the screen lights up[62]
The power button is typically located on the side of the device. Once pressed, you’ll see the Dojo logo appear on screen, indicating the device is booting up. This initial startup might take slightly longer than subsequent power-ups as the system configures itself for the first time.
With these steps completed, your Dojo card machine should be powered on and ready for the next stage of setup connecting to the internet and activating your device.
Connecting to the Internet and Activating the Device
After powering up your Dojo card machine, the next crucial step involves establishing connectivity and activating your device. This process ensures your machine can process transactions securely and efficiently.
Connect to Wi-Fi or use built-in 4G SIM
The Dojo card machine offers two connectivity options for maximum reliability. Once your device boots up, it will prompt you to connect to Wi-Fi simply follow the on-screen instructions to select and connect to your network. Make sure your Wi-Fi network is password-protected for security reasons.
Nevertheless, you don’t need to worry about connectivity issues. Your Dojo card machine comes with a built-in SIM card that provides 4G connectivity as a backup. This means if your Wi-Fi connection drops, the terminal automatically switches to mobile data, ensuring uninterrupted payment processing.
To switch between Wi-Fi networks at any time, navigate to Menu > Settings > Wi-Fi Settings > Select a Wi-Fi Connection on your device.
Enter your activation code
Following the connectivity setup, the system will prompt you to enter your activation code. Dojo sends this unique code directly to you, and it’s essential for completing the setup process. Carefully type in the code exactly as provided by Dojo.
The activation code verifies your merchant account and links the physical device to your business profile within the Dojo system.
Verify device status and connectivity
Subsequently, you’ll want to confirm that your device is properly connected and ready to use. To check your connection status and device version, navigate to Menu > Settings > About on your terminal.
When successfully connected and operating in Integrated Mode, you should see a green tick box on your screen indicating the device is ready to process payments through your point-of-sale system. Note that this tick box is for display purposes only you cannot manually toggle it to connect or disconnect from your POS.
Through these straightforward steps, your Dojo card machine should now be online and activated, ready for the next configuration phase.
Setting Up Payment Modes and Integrations
Now that your device is activated, it’s time to configure how you’ll process payments. Your Dojo card machine offers various payment options to match your business needs both through your EPOS system and as a standalone device.
Enable integrated payments with EPOS
Integrated payments connect your card machine directly to your EPOS system, eliminating the need to enter transaction amounts twice. To enable this feature:
- Tap Menu on your card machine
- Select Settings
- Choose Integrated Payments
- Enter your supervisor code (provided by Dojo)
- Toggle ON “Pay At Counter”
Once configured, your EPOS and card machine will communicate seamlessly. This integration increases accuracy by removing manual keying errors while speeding up end-of-day reconciliation as transactions automatically sync between devices.
Switch to non-integrated mode if needed
During EPOS system outages, you can still process payments by switching to standalone mode:
- Tap Menu then Settings
- Select Non-Integrated Payments
- Enter your supervisor code
- Toggle ON “Non-Integrated Payments”
- Enable both “Sales” and “Refunds” options
Remember to disable integrated mode after enabling non-integrated payments by returning to Integrated Payments settings and toggling OFF “Pay At Counter”.
Set up manually keyed transactions
For phone payments (card-not-present transactions), enable manually keyed transactions:
- Tap Menu then Settings
- Select Manually Keyed Transactions
- Enter your supervisor code
- Toggle ON “Enable manually keyed transactions”
This feature proves essential for businesses that take orders over the phone or need to process payments remotely.
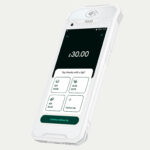
Configure tipping and receipt options
Customize how customers leave tips directly on your terminal:
- Navigate to Integrated Payments settings
- Toggle ON or OFF “Gratuity” as desired
With gratuity enabled, customers can select a tip percentage or enter a custom amount during checkout. Regarding receipts, you can offer customers email receipts as an eco-friendly alternative to printed ones, saving paper while providing convenient digital records.
Through these simple configurations, your Dojo card machine transforms into a versatile payment solution that adapts to your specific business requirements while keeping transactions flowing smoothly.
Testing, Troubleshooting, and Going Live
Once your Dojo card machine is configured, performing a few final checks ensures everything works properly before accepting customer payments.
Run a test transaction
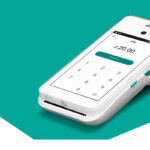
First, conduct a test payment to verify your setup:
- Request a test card from Dojo for physical machine testing
- Start a small transaction (£1.00 is ideal)
- Insert or tap the test card as you would with a regular payment
- Confirm the transaction completes successfully
This verifies your device processes payments correctly and confirms connectivity with payment networks.
Check transaction history and receipts
After running test transactions, easily review your payment records:
- Tap the Menu icon (three line dashes) at top left
- Select Transactions
- Browse the list organized by date and time
Each entry shows card scheme, transaction time, and amount. Refunds appear in red with negative values, while declined transactions display with a prohibited symbol. The terminal stores a full week of transactions, allowing you to reprint or email receipts by selecting any transaction and tapping Receipt.
Common setup issues and how to fix them
Fortunately, most setup problems have simple solutions:
- Connectivity issues: If Wi-Fi fails, your terminal automatically switches to the built-in 4G SIM
- Transaction timeouts: Choose “Manually Override” if payment processed successfully or “Cancel and Retry” if it failed
- Reconciliation discrepancies: Compare EPOS card transactions against Dojo transactions with matching date ranges
When to contact Dojo support
Finally, contact Dojo support at 0800 044 3550 if you experience:
- Persistent connectivity problems despite troubleshooting
- Terminal showing error codes not covered in documentation
- Issues with payment processing that persist after restarts
- Account-related questions requiring merchant support
Conclusion
Setting up your Dojo card machine truly requires minimal effort yet delivers maximum results for your business. Throughout this guide, we’ve explored the straightforward process from unboxing to processing your first transaction. The device stands out with its impressive 58% faster transaction processing compared to market averages, alongside competitive 1% transaction fees and convenient next-day payouts.
Additionally, the dual connectivity options ensure your business never misses a sale, whether through primary Wi-Fi or the automatic 4G backup. This reliability factor certainly makes a significant difference during busy periods when payment processing delays could impact customer satisfaction.
Perhaps most importantly, the flexibility between integrated EPOS payments and standalone functionality means your business can adapt to different situations without disruption. Therefore, you’ll always have options available should your primary systems experience temporary issues.
After completing your setup, remember to conduct a test transaction before going live with customer payments. This simple step helps identify potential issues early, ensuring smooth operations from day one. Similarly, familiarizing yourself with the transaction history features will streamline your end-of-day reconciliation process.
Overall, the Dojo card machine offers a perfect balance of simplicity and functionality that suits businesses of all sizes. Once set up according to these guidelines, you’ll wonder how you ever managed without such an efficient payment solution. Start accepting payments today and watch your business operations transform with faster, more reliable transaction processing at your fingertips.