Setting up a Teya card machine can be done quickly and efficiently, allowing your business to start accepting payments almost immediately. As a fast-growing merchant service provider specifically designed for small and medium-sized businesses across the UK, Teya offers comprehensive payment solutions that can transform how you handle transactions.
In this guide, we’ll walk you through the complete setup process for your Teya card machine UK, which typically takes just a day or two to get started if your application is accepted promptly. You’ll discover why businesses appreciate Teya’s quick settlement process usually within one business day which significantly improves cash flow.
Additionally, we’ll cover everything from basic setup to troubleshooting common issues, helping you make the most of features like the free tap-on-phone app for Android users. With processing fees ranging from 1.29% to 1.9% per transaction and card machine rental at £24.90 monthly for most merchants, understanding how to properly configure your device is essential for maximizing value.
Getting Started with Your Teya Card Machine
Your Teya card machine arrives ready to transform how you handle payments, with minimal setup required to get you up and running. Before diving into the actual setup process, let’s understand who this payment solution works best for, what comes in the box, and the actual time investment needed.
Who is the Teya card machine for?
Teya has designed its payment solutions primarily for small and medium-sized businesses across the UK. The ideal users include local businesses such as corner shops, hairdressers, cafés, and independent retail stores.
Moreover, the Teya Pro card machine particularly suits businesses that:
- Handle high transaction volumes throughout the day
- Need devices with long-lasting battery life
- Move between different locations and require consistent connectivity
- Want to provide customers with a sleek, modern payment experience
- Need reliable payment processing without WiFi dependency
Most small-to-medium business types are accepted, though charities and certain high-risk businesses may face restrictions.
What you need before setup
When your Teya card machine arrives, you’ll find everything neatly packaged in a branded box. The welcome package typically includes:
- The card machine (fully charged upon arrival)
- USB Type-C cable and power adapter
- Quick start guide
- Promotional stickers
- Receipt paper (one roll installed and possibly a spare)
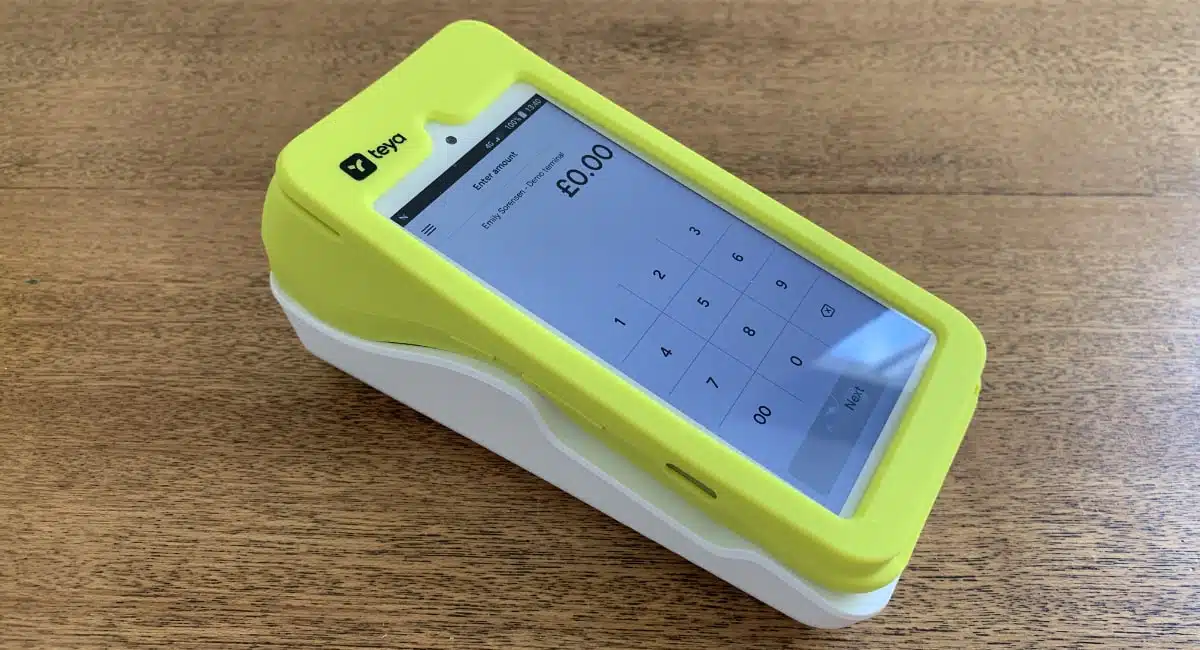
Furthermore, some models come with a white countertop holder and a protective lime/yellow cover with the Teya logo.
Before beginning setup, ensure you have your business bank account details ready, as you’ll need to link these during activation. Additionally, if you’re an employee rather than the business owner, the legal representative will need to create a member account and verify the terminal by inputting a verification code.
How long does setup really take?
Despite what many merchants might expect, setting up a Teya card machine is remarkably fast. According to Teya, the entire process takes approximately five minutes from unboxing to accepting your first payment.
The device arrives fully charged, therefore you can start the setup immediately. Many users report that Teya offers “possibly the easiest and fastest” card terminal setup experience available.
The streamlined activation process, combined with pre-installed features like the 4G SIM card, means you can be operational almost instantly, allowing your business to begin processing payments without unnecessary delays.
Quick Setup in Under 10 Minutes
Now let’s dive into the step-by-step process of setting up your Teya card machine. The entire setup process can be completed in just five minutes, allowing you to start accepting payments immediately.
1. Power on and connect to Wi-Fi or 4G
To begin, locate the power button on the right side of your Teya card machine. Press and hold it for a few seconds until the device boots up. Initially, you’ll be prompted to select your preferred language and region.
Your device comes with a pre-installed 4G SIM card that connects automatically to mobile networks. For a more stable connection, swipe down from the top of the screen, select the Wi-Fi icon, choose your network, and enter the password.
2. Log in to your merchant account
Once connected to the internet, your device may download and install the latest software updates. After this process completes, follow the on-screen prompts to activate your device.
You’ll need to set up a 4-digit manager PIN that will be used to access secure settings. Keep this PIN confidential as it protects your business operations.
3. Configure payment settings
Access payment settings by tapping the Menu in the upper left corner of the screen. Enter your manager PIN when prompted to customize your payment options.
4. Enable tipping and receipt options
To set up tipping, tap Menu, select Payment Settings, enter your manager PIN, and toggle the Tips button to activate. You can customize the default percentages (10%, 15%, and 20%) using the plus and minus buttons.
For receipts, navigate to Menu → Payment Settings → Receipts. Toggle the Merchant Receipt option to automatically print after each transaction. Alternatively, you can print receipts later from the transaction history.
5. Perform a test payment
Finally, conduct a test transaction of a small amount (like £0.10) using your own card. This confirms that the machine can read cards, process payments, and print receipts correctly. Afterward, you can void or refund this test transaction.
That’s it! Your Teya card machine is now fully configured and ready to accept customer payments.
Common Setup Issues and How to Fix Them
Even with careful setup, you might occasionally encounter issues with your Teya card machine that require quick fixes. Here’s how to resolve common problems.
Wi-Fi or SIM not connecting
To restore internet connection on your Teya terminal, first check your Wi-Fi status. Navigate to Menu→Device Settings→Wi-Fi to verify you’re connected to the correct network. If needed, disconnect and reconnect to refresh the connection.
Alternatively, switch to mobile data if Wi-Fi remains unstable. Enable Mobile data (SIM/4G) from your quick settings menu. For a stronger signal, go to Device Settings→Mobile networks→Network operators and manually select a more stable carrier.
Login errors and password resets
If you’ve forgotten your password, simply click “Forgot password” and follow the prompts. For users being prompted to log in to Teya for the first time, use your existing email and set up a new password.
Should you not receive a password reset email, verify you’ve entered the correct email address, check your spam folder, and request another email if needed. After six incorrect password attempts, you’ll be locked out for 30 minutes unless you reset your password.
Software update failures
Your Teya card machine requires regular software updates for optimal performance. Failed updates often stem from poor internet connectivity. Ensure your device has a stable connection before attempting updates.
Remember that outdated software may prevent you from accepting payments and could breach Teya’s terms of service.
Printer not working
The most common reason for printing failures is low battery (under 15%). Check your battery status in the upper right corner if red, charge using the USB-C cable or charging base until full.
Another frequent issue involves incorrectly inserted paper rolls. Open the printer cover, ensure the till roll unrolls from the back with the shiny side up, and leave about 5 cm of paper beyond the printer’s cutter.
Optimizing Your Teya Card Machine for Daily Use
Once your Teya card machine is operational, several features can help streamline your payment processes and boost efficiency.
Using the Teya Business App for tracking
The Teya Business App serves as your business’s command center. With its redesigned interface, you can easily monitor sales performance and compare today’s figures with yesterday’s results. The app’s bottom navigation bar includes five main tabs Home, Sales, Sell, Account, and Explore making it simple to access essential functions with just one tap.
Setting up payment links
Pay By Link allows you to accept remote payments instantly. Create payment links directly from your card machine, Teya App, or Business Portal. Links expire after either 30 minutes or 24 hours when created on the machine, while those created through the app offer customizable expiry dates. Adding descriptions to payments helps match transactions with specific orders or customers.
Integrating with POS systems
Teya supports two primary integration types. The Cloud Communication (POSLink) integration connects separate terminal and till devices via the internet. Alternatively, App-to-App integration installs the partner’s ePOS application directly on your Teya terminal, ideal for mobile setups like food trucks.
Knowledge of settlement reports
Settlement reports detail your financial transactions from authorization to deposit. Daily reports arrive by email each morning by 10 AM, while monthly summaries are sent during the first week of each month. You can also access these through the Teya App (Explore > Settlements) or Business Portal.
Using the cashback business card
Your complimentary Teya Business Account includes a Visa Platinum debit card offering 0.5% cashback on all purchases with no spending limits. Cashback is credited monthly directly into your Business Account. To check your rewards, simply open the app and tap your cashback balance.
Conclusion
Setting up your Teya card machine truly takes less than ten minutes, making it an excellent choice for busy small business owners who need payment solutions without complicated setup procedures. This quick configuration process allows you to start accepting payments almost immediately after unboxing.
Though simple to set up, your Teya terminal offers sophisticated features worth exploring beyond basic transactions. Payment links provide flexibility for remote sales, while the comprehensive business app gives you real-time insights into your daily performance. Additionally, the cashback business card rewards your everyday spending with automatic returns directly to your account.
Should you encounter any issues during setup or daily operations, the troubleshooting steps outlined above will help resolve most common problems quickly. From connectivity challenges to printer paper installation, these simple fixes ensure minimal disruption to your business.
Overall, Teya’s payment solution balances simplicity with powerful features that grow with your business needs. The straightforward setup process serves as just the beginning of a payment system designed specifically for UK small and medium businesses. Your new card machine will not only process payments efficiently but also provide valuable business tools that help streamline operations and improve your cash flow.